Quantcast
Channel: Chatstack Support Center
Viewing all 31 articles
Browse latest View live

Department jQuery HTML Code

$
0
0

A department Live Help button will show the Live Help status for just one department. When the visitor clicks the department button they will be directed to that department and not given the option to select an available department.

If you wish to insert a department button within your web pages then you will need to modify step 2 of the HTML code. You would modify the HTML code for your department as shown below in bold. You need to change both LiveHelpSettings.department = ‘Sales‘ and /livehelp/include/status.php?DEPARTMENT=Sales. This example is for a Sales department Live Help button.

Step 1.

The following lines should be added on each page after your <title> tag and just before your </head> tag (this should be added once per page):


<!-- stardevelop.com Live Help International Copyright - All Rights Reserved //-->
<!-- BEGIN stardevelop.com Live Help Messenger Code - Copyright - NOT PERMITTED TO MODIFY COPYRIGHT LINE / LINK //-->
<script type="text/JavaScript" src="/livehelp/scripts/jquery-latest.js"></script>
<script type="text/javascript">
<!--
    var LiveHelpSettings = {};
    LiveHelpSettings.server = 'www.example.com';
    LiveHelpSettings.embedded = true;
    LiveHelpSettings.department = 'Sales';
    (function(d, $, undefined) {
        $(function() {
        $(window).ready(function() {
            // JavaScript
            var LiveHelp = d.createElement('script'); LiveHelp.type = 'text/javascript'; LiveHelp.async = true;
            LiveHelp.src = ('https:' == d.location.protocol ? 'https://' : 'http://') + LiveHelpSettings.server + '/livehelp/scripts/jquery.livehelp.js';
            var s = d.getElementsByTagName('script')[0];
            s.parentNode.insertBefore(LiveHelp, s);
        });
        });
    })(document, jQuery);
-->
</script>
<!-- END stardevelop.com Live Help Messenger Code - Copyright - NOT PERMITTED TO MODIFY COPYRIGHT LINE / LINK //-->

Note: You don’t need to include the <script> tag to /whmcs/includes/jscript/jquery.js if your web site already includes the jQuery JavaScript library.

Step 2.

The following lines need to be added where you wish to display the Live Help status indicator button (you may display many Live Help status buttons on a single page):

<!-- stardevelop.com Live Help International Copyright - All Rights Reserved //-->
<a href="#" class="LiveHelpButton"><img src="/livehelp/include/status.php?DEPARTMENT=Sales" id="LiveHelpStatus" name="LiveHelpStatus" class="LiveHelpStatus" border="0" alt="Live Help" /></a>
<!-- END Live Help HTML Code - NOT PERMITTED TO MODIFY IMAGE MAP/CODE/LINKS //-->

Please note: The above second step is optional and should only be added to web pages that you wish to display the Live Help button.


Adding Operator Accounts

$
0
0

Within the Live Help Messenger Windows application you can manage the operator accounts within the Accounts tab (as shown in the screenshot below).  You can easily see what operators are logged into Live Help and update any account details as required.  For each operator you are able to setup the account username, first name, last name, email address, department, access level, account status and operator icon.

Easily Manage Operator Accounts within Live Help

Easily Manage Operator Accounts within Live Help

Account Options (Add / Delete and Change Password)

You are also able to easily Add Accounts, Delete Accounts, Change Status Mode and Change Password for an account. You can access these additional options for the Options button in the bottom right corner of the Accounts section (shown below).’

Add / Delete Account and Change Password

Options Button - Add / Delete Accounts and Change Passwords

Managing Departments

$
0
0

In order to manage departments you must associate a department to an operator when creating the account. When creating or editing accounts you can enter a department within the appropriate department field.

Guest Account - Easily Enter Assign a Department to the Account

Guest Account - Easily Enter Assign a Department to the Account

Assign Multiple Departments

In certain circumstances it is necessary for an operator to be assigned to multiple departments eg. Technical Support and Sales departments. When assigning a user to multiple departments enter the values within the departments field separated by semi-colons eg. Support; Sales; Management. The example above shows the Guest account that is assigned to Support, Sales and Management departments.

Chat Window - Visitors can easily select an Online Department

Chat Window - Visitors can easily select an Online Department

Your site visitors will be prompted to select a department when request a Live Help chat from your web site. Departments are only displayed to your site visitors if an operator is available within the department (shown above).

Invalid UTF-8 Character Encoding

$
0
0

If you are translating the Live Help language pack files to your own language then you may experience the following issue with invalid UTF-8 characters appearing within the Live Help chat window.  This error will occur if you have not correctly saved the language pack files as UTF-8.

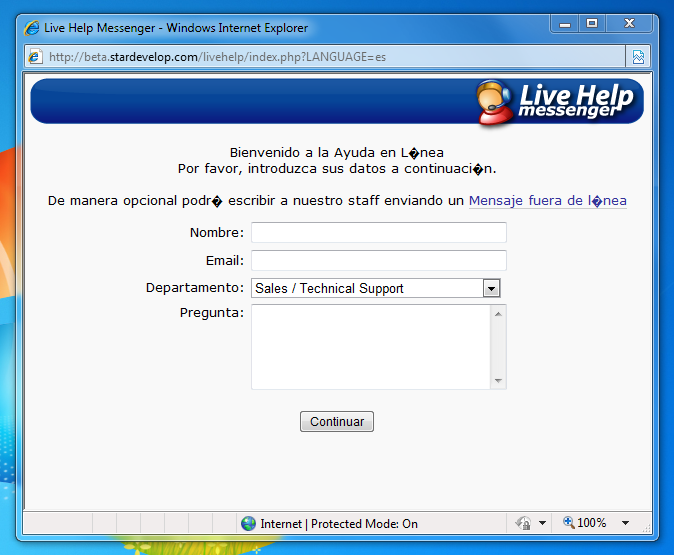
A screenshot is shown below of the issue occurring with a Spanish language pack, an incorrectly saved language pack file will show invalid characters such as � within the chat window.  Note: We only include an English language pack with Live Help, this is just an example for the purposes of this KB article.

Live Chat Window - UTF-8 Language Character Issue

Live Chat Window - UTF-8 Language Character Issue

In order to resolve the issue you will need to open the /livehelp/locale/en/guest.php file or the guest.php file in the correct language pack folder using Notepad.  It is best to use Microsoft Notepad as it has the correct options for saving the language pack file as UTF-8 encoding.

Once you have the language pack open in Notepad, you should have the language pack file open as shown below. You then need to save the file as UTF-8 Encoding as shown within the second screenshot below.

Guest Language Pack File Open within Microsoft Notepad Saving Language Pack as UTF-8 Encoding

Blank Live Help Chat Window Issue

$
0
0

If you have installed Live Help and the Live Help popup window is showing a blank chat window then we recommend the following troubleshooting steps.

  • Check that the /livehelp/templates_c/ directory exists. If this directory doesn’t exist then please create it.
  • If the chat window is still blank then make the /livehelp/templates_c/ directory writable. We recommend that you try the following permissions in this order 755, 775 and 777. Windows Servers should have Full Control permissions for the Internet Guest Account

The /livehelp/templates_c/ directory should be writable so that the Live Help templates can be created. This issue will only affect Live Help installations v3.90 and above.

Please note: If you are using Security-Enhanced Linux (SELinux) then you may also need to setup allow_httpd_anon_write to 1. You can do this by running the command setsebool -P allow_httpd_anon_write 1

MaxMind IP City Location Support

$
0
0

The Live Help v3.90 and above supports IP City level location detection. We support the MaxMind GeoLite City (free) and MaxMind GeoIP City (paid with higher accuracy) databases. These databases are not included with the Live Help downloads (due to the size of the database) so you will need to download the latest database from the MaxMind web site. The following instructions are for installing the database.

  • Download the MaxMind GeoLite City database at GeoLite City (Approx. 18MB)
  • Unzip the file on your local PC, you can use a free tool like 7zip for unzipping the GeoLiteCity.dat.gz file.
  • Upload the GeoLiteCity.dat file to the /livehelp/plugins/maxmind/ directory. The file is approximately 30MB so this may take some time.
  • The GeoLite database should be located at /livehelp/plugins/maxmind/GeoLiteCity.dat when finished uploading

The MaxMind GeoLite database is updated each month (normally on the 1st of each month) so you can replace this file every month if you wish to use the most accurate location data. Further details on the MaxMind GeoLite City database is available at http://www.maxmind.com/app/geolitecity

WHMCS VoIP Call Back HTML Code

$
0
0

If you have setup Live Help Messenger as a WHMCS module then you need to install special HTML code on your web pages to support the WHMCS integration.

In order for your customers to request a VoIP / Skype telephone callback, you will need to add the Live Help Callback HTML code to your web site’s pages. There are two steps to ensure Live Help will run correctly on your web pages.

Please note: These first step is the same HTML code that is required for the regular Live Help button – this code is used for tracking your web site visitors. Only step two is required if you wish to use the Live Help VoIP call back feature.

You will need to edit the bold text within the HTML code so that the HTML code points to your WHMCS installation folder. An absolute path is required for the HTML code to work as expected.

Step 1.

The following lines should be added on each page after your <title> tag and just before your </head> tag (this should be added once per page):


<!-- stardevelop.com Live Help International Copyright - All Rights Reserved //-->
<!-- BEGIN stardevelop.com Live Help Messenger Code - Copyright - NOT PERMITTED TO MODIFY COPYRIGHT LINE / LINK //-->
<script type="text/JavaScript" src="/livehelp/scripts/jquery-latest.js"></script>
<script type="text/javascript">
<!--
    var LiveHelpSettings = {};
    LiveHelpSettings.server = 'www.example.com/whmcs/modules';
    LiveHelpSettings.embedded = true;
    (function(d, $, undefined) {
        $(window).ready(function() {
            // JavaScript
            var LiveHelp = d.createElement('script'); LiveHelp.type = 'text/javascript'; LiveHelp.async = true;
            LiveHelp.src = ('https:' == d.location.protocol ? 'https://' : 'http://') + LiveHelpSettings.server + '/livehelp/scripts/jquery.livehelp.js';
            var s = d.getElementsByTagName('script')[0];
            s.parentNode.insertBefore(LiveHelp, s);
        });
    })(document, jQuery);
-->
</script>
<!-- END stardevelop.com Live Help Messenger Code - Copyright - NOT PERMITTED TO MODIFY COPYRIGHT LINE / LINK //-->

Note: You don’t need to include the <script> tag to /whmcs/includes/jscript/jquery.js if your web site already includes the jQuery JavaScript library.

Step 2.

The following lines need to be added where you wish to display the Live Help status indicator button (you may display many Live Help status buttons on a single page):

<!-- stardevelop.com Live Help International Copyright - All Rights Reserved //-->
<a href="#" class="LiveHelpCallButton"><img src="/whmcs/modules/livehelp/include/status.php?CALLBACK" id="LiveHelpStatus" name="LiveHelpStatus" class="LiveHelpStatus" border="0" alt="Live Help" /></a>
<!-- END Live Help HTML Code - NOT PERMITTED TO MODIFY IMAGE MAP/CODE/LINKS //-->

Please note: The above second step is optional and should only be added to web pages that you wish to display the Live Help VoIP call back button.

VoIP / Skype Call Back HTML Code

$
0
0

In order for your potential customers to find your online status, you will need to add the HTML code to your web site’s pages. There are three simple steps to ensure Live Help will run correctly on your web pages. If you use Joomla or WordPress then you can install the Joomla module or WordPress plugin to automatically add the HTML code

Step 1.

In order for your customers to request a VoIP / Skype telephone callback, you will need to add the Live Help Callback HTML code to your web site’s pages. There are three simple steps to ensure Live Help will run correctly on your web pages.

Please note: These first steps are the same steps that are required for the regular Live Help button. Only step three is required if you have already placed step one and two on your web site.


<!-- stardevelop.com Live Help International Copyright - All Rights Reserved //-->
<!-- BEGIN stardevelop.com Live Help Messenger Code - Copyright - NOT PERMITTED TO MODIFY COPYRIGHT LINE / LINK //-->
<script type="text/JavaScript" src="/livehelp/scripts/jquery-latest.js"></script>
<script type="text/javascript">
<!--
    var LiveHelpSettings = {};
    LiveHelpSettings.server = 'www.example.com';
    LiveHelpSettings.embedded = true;
    (function(d, $, undefined) {
        $(window).ready(function() {
            // JavaScript
            var LiveHelp = d.createElement('script'); LiveHelp.type = 'text/javascript'; LiveHelp.async = true;
            LiveHelp.src = ('https:' == d.location.protocol ? 'https://' : 'http://') + LiveHelpSettings.server + '/livehelp/scripts/jquery.livehelp.js';
            var s = d.getElementsByTagName('script')[0];
            s.parentNode.insertBefore(LiveHelp, s);
        });
    })(document, jQuery);
-->
</script>
<!-- END stardevelop.com Live Help Messenger Code - Copyright - NOT PERMITTED TO MODIFY COPYRIGHT LINE / LINK //-->

Step 2.

The following lines need to be added where you wish to display the VoIP / Skype Call Back button (you may display many Live Help status buttons on a single page):

<!-- stardevelop.com Live Help International Copyright - All Rights Reserved //-->
<a href="#" class="LiveHelpCallButton"><img src="/livehelp/include/status.php?CALLBACK" id="LiveHelpStatus" name="LiveHelpStatus" class="LiveHelpStatus" border="0" alt="Live Help" /></a>
<!-- END Live Help HTML Code - NOT PERMITTED TO MODIFY IMAGE MAP/CODE/LINKS //-->

Example (Status Button Code – Step 2):

Live Help


Adding Custom Smarty Templates

$
0
0

From within the Live Help Server Software v3.90 and above you are able to create custom templates. The templates are based on the PHP Smarty templating system and allow you to customise the guest chat window to suit your own web site design and layout.

  1. Make a copy of either the /livehelp/templates/default/ or /livehelp/templates/whmcs-portal/ folder.
  2. Rename the copied duplicate folder to the name of your template e.g. /livehelp/templates/custom/
  3. Edit the .tpl files to change the HTML code, don’t change any tags or {} Smarty tags.
  4. Configure your new template to load as the default template in the Live Help Windows app > Settings tab > Appearance > Template

You can also customise the following folders and images if you wish to make advanced customisations to the images and CSS.

  1. /livehelp/images/ – Contains images that shouldn’t need translating
  2. /livehelp/locale/en/images/ – Contains images that need translating for each language pack.
  3. /livehelp/styles/ – Contains CSS styles, some of these are generated from PHP and use the settings that are configured within the Live Help Windows app > Settings tab > Appearance section.

Live Chat Zendesk Integration

$
0
0

To setup Live Chat to function with Zendesk you will need to create an extension within the Zendesk administration. You can setup the extensions within the Zendesk Administration > Settings > Extensions. You should then click Add Widget > Global JavaScript. The paste the following code. The Global JavaScript widget will insert the Live Help JavaScript and Live Help visitor tracking code on all your web pages.

One you have pasted the above code into the Zendesk Global JavaScript widget you will need to edit the following line near the bottom of the JavaScript code. You should change the bold text to the domain where you have installed the Live Help software. Only add the domain to this text as the /livehelp/ folder will be added automatically.

LiveHelpSettings.url = 'www.example.com';

You can also create a Custom widget with the following code if you wish to display the Live Help chat button on certain pages. You also need to edit the bold text within the code below to point to your Zendesk installation.

<!-- stardevelop.com Live Help International Copyright - All Rights Reserved //-->
<!-- BEGIN Live Help HTML Code - NOT PERMITTED TO MODIFY IMAGE MAP/CODE/LINKS //-->
<a href="#" target="_blank" class="LiveHelpButton">
<img src="http://www.example.com/livehelp/include/status.php" id="LiveHelpStatus" name="LiveHelpStatus" class="LiveHelpStatus" border="0" alt="Live Help" />
</a><!-- END Live Help HTML Code - NOT PERMITTED TO MODIFY IMAGE MAP/CODE/LINKS //-->

How can I setup my profile image in the chat window?

$
0
0

Within Chatstack (from v5.0) we display an account profile photo to your customers so that you can build trust with your customers. We highly recommend that you use this feature to help grow your business and show that there are actual people working in your business.

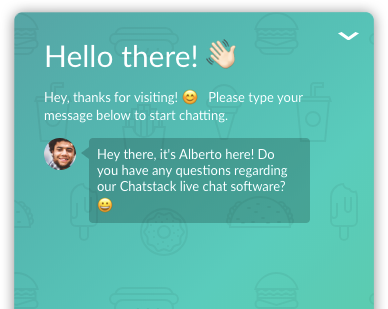
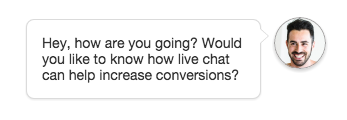
We have several options to setup the account profile images, such as setting up Gravatar or manually uploading your image. The operator account image will appear at the top of the chat window. It is also displayed beside the initiate chat message as shown in the example images below:

If you’d like to use Gravatar, you can register your email address assigned to your account at www.gravatar.com. Once registered you are able to upload the operator image you wish to use in your Gravatar profile. The image you’ve setup will automatically load in the initiate chat and chat tab as shown in the example screenshots above. Gravatar is great, as if you ever reinstall the software, as long as you use the same emails the photos will still be all working without having to re-upload each account photo.

Alternatively, you are also able to manually upload your own images when editing your account. Simply start editing your account (or when creating a new account) and click your image shown in the top right corner, you should then browse to a new image that will be uploaded when saving your account. When manually uploading images you should use an exact 300px by 300px PNG image.

If you’re strongly against showing your operator photos within the initiate chat then you can override the initiate chat image within the Settings > Images > Initiate Chat Logo setting. We recommend that you use a 150px by 150px PNG image for this setting.

Feel free to contact us via. live chat or email us at support@chatstack.com if you need assistance.

The post How can I setup my profile image in the chat window? appeared first on Live Help Documentation.

How do I move the live chat tab?

$
0
0

We don’t recommend moving the chat tab as nearly all live chat apps have live chat positioned on the bottom right corner. This is where most customers will expect the live chat to be displayed.

You could move the chat tab by editing the CSS files however this is not recommended unless you are experienced with modifying CSS stylesheets.  If you decide to modify the CSS then the chat tab would still need to docked along the bottom of the screen, we don’t support docking the chat to the sides or top of the browser window.

The post How do I move the live chat tab? appeared first on Live Help Documentation.

How long is Chatstack supported for after each release?

$
0
0

You receive free support and updates for 6 months after placing your order. If you ordered on 15 September 2015, you will receive major and minor update until 15 April 2015.  If we release v5.1 on 15 October 2015 you would receive that update and security updates for that release would end on 15 May 2015.  We only support a release for security updates for 6 months, then you’d need to update to a new version to continue receiving security updates.

Basically you are paying extra to extend your support and updates access to receive new major features.  The access to the new versions would then extend the security updates as per our 6 months after each release date.

You’ll receive security updates for 6 months after every release, even if that falls outside your paid updates time frame. The security update would only be applied to the version thats included in your support / updates time frame (so it would just be a minor build update).  Essentially any security updates that are issued wouldn’t give you access to any new version or major features.

The post How long is Chatstack supported for after each release? appeared first on Live Help Documentation.

Translating departments within the language pack files

$
0
0

Within Chatstack v5.1 you are able to translate the departments to different languages. If running an earlier version of the server software then you would need to upgrade to the latest release before you can translate the departments.

The departments you wish to translate should already be setup in the operator app as English departments using English names. When the English departments are setup, you will need to translate each English department within the non-English language pack files. i.e. /livehelp/locale/tr/guest.php for Turkish.

In a section of the language pack below we will use Turkish as an example. You can refer to the following translation as an example:

$_LOCALE['departments']['Sales'] = 'Satış';
$_LOCALE['departments']['Support'] = 'Destek';
$_LOCALE['departments']['General'] = 'Genel';
$_LOCALE['departments']['Billing'] = 'Billing';
$_LOCALE['departments']['Administrator'] = 'Yönetici';

For the above you can see that we now have translations for the following English departments:

Sales
Support
Billing
Administrator

If you need to add another department then you would create the English department by assigning the department to an operator (you do this by editing an existing operator account). Then add the English name of the department. Don’t add departments using other languages when you which to translate the names, the default departments in the app should be set to English. For example, you might add the English department to an account.

Reseller Software

You’d then edit the /livehelp/locale/tr/guest.php file and add the line below to translate that department to Turkish.

$_LOCALE['departments']['Reseller Software'] = 'Bayi Satış';

If you have further questions or clarifications, feel free to contact us via. live chat or email us at support@chatstack.com.

The post Translating departments within the language pack files appeared first on Live Help Documentation.

How can I check the version of my WHMCS live chat add-on?

$
0
0

You can check the version of your WHMCS live chat add-on by opening any PHP files within the /modules/livehelp folder in a text editor application. You may need to use an FTP or SFTP application to open one of these files from your web site. The live chat version is shown within a comment at the top of every encoded PHP file like the following example. For this example you can see the live chat add-on version is v4.1 rev 3.

// *************************************************************************
// *                                                                       *
// * WHMCS - Live Chat & Visitor Tracking Addon                            *
// * Copyright (c) WHMCS Ltd. All Rights Reserved,                         *
// * Version: 4.1 rev 3                                                    *
// * Build Date: 25 Aug 2014                                               *
// *                                                                       *
// *************************************************************************
// *************************************************************************
// *                                                                       *
// * Email: info@whmcs.com                                                 *
// * Website: http://www.whmcs.com                                         *
// *                                                                       *
// *************************************************************************
// *                                                                       *
// * This software is furnished under a license and may be used and copied *
// * only  in  accordance  with  the  terms  of such  license and with the *
// * inclusion of the above copyright notice.  This software  or any other *

The post How can I check the version of my WHMCS live chat add-on? appeared first on Live Help Documentation.


Translating settings within the language pack files

$
0
0

Translating settings translation is now supported in the v5.1 release. You can now translate the global values set within the chat app > Settings tab in the language pack file at /livehelp/locale/en/guest.php.

At the moment, there are two settings (the welcome message and the chat window name), these can be translated as shown below:

Welcome Message

$_LOCALE['introduction'] = 'Hey there! How are you today?';

Live Help Name

$_LOCALE['appname'] = 'Live Chat';

These lines will be included in the language pack file from v5.1 and later. You should only translate the above lines in non-English language packs and you should leave the app settings configured as English.

Feel free to contact us via. live chat or email us at support@chatstack.com if you have questions.

The post Translating settings within the language pack files appeared first on Live Help Documentation.

How can I add the live chat HTML code to a Magento installation?

$
0
0

So you would like to add live chat to your Magento store? This can be accomplished by editing your Magento template file. You will need to use the HTML code as shown at https://www.chatstack.com/kb/live-help-jquery-html-code/ and add this to your Magento theme files, the theme files will vary based on how your theme is setup. Please refer to option 1 and check if the file indicated exists, if not then you’ll need to complete option 2.

Option 1

Look for the app/design/frontend/{template}/page/html/head.phtml file where {template} is the name of your active Magento template. If this file doesn’t exist, then you will need to check if the app/design/frontend/{template}/default/page/html/head.phtml file exists. It is recommended to place the step 1 chat code right before the </head> section of the file.

Option 2

You only need to refer to this option if the template files described in the first option don’t exist. Some custom Magento templates might not have a head.phtml file and the template would be using the base template file. For this situation, you would need to copy the base head.phtml into your custom template.

Copy the app/design/frontend/default/page/html/head.phtml file from your default base template to your custom template folder at app/design/frontend/{template}/page/html/head.phtml. You can then open the file and place the chat code before the </head> tag as recommended.

Feel free to contact us via. live chat or email us at support@chatstack.com for further assistance.

The post How can I add the live chat HTML code to a Magento installation? appeared first on Live Help Documentation.

FullContact Integration / Social Profiles

$
0
0

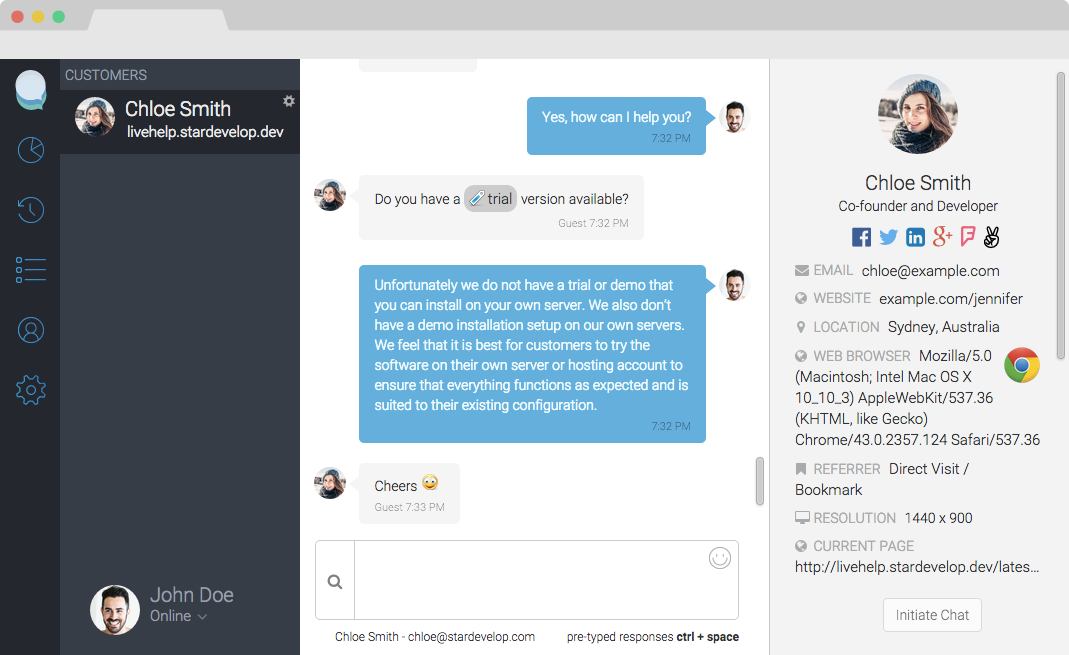
Within the Chatstack v5.1 server software, you are able to enable FullContact integration, allowing the operator to easily access social links (e.g. Twitter, Facebook, LinkedIn, Google+, Foursquare, and GitHub profiles) for each chatting visitor.

Visitor Social Profiles and Customer Details

To enable the FullContact integration within your installation, you will need to register for a free API key at fullcontact.com/developer/. The free API includes 500 email lookups / month. You can also contact FullContact if you would like to arrange a custom plan between the free and Starter plan that they offer, further pricing details are available fullcontact.com/developer/pricing/.

After you have completed the signup with FullContact, your FullContact API key should be emailed to you and also accessible in your account. You then need to edit or add the following line within your /livehelp/include/database.php configuration file:

define('FULLCONTACTAPIKEY', 'XXXXXXXXXXX');

The above line needs to be placed before the return true; line of the database.php file. The XXXXXXXXXXX needs to be updated with your FullContact API key. Once that file has been updated you are ready to start viewing social profiles and additional details for each chat that enters their email address.

Feel free to contact us via. live chat or email us ​at​ support@chatstack.com for further assistance.

The post FullContact Integration / Social Profiles appeared first on Live Help Documentation.

Chatstack v5.1 HTML Code

$
0
0

From Chatstack v5.1 and above we have new HTML code available that will help minimize conflicts with existing jQuery libraries and jQuery plugins that might already be on your web pages. It is recommended to use this updated live chat HTML code however the previous HTML code at http://www.chatstack.com/kb/live-help-jquery-html-code/ is still fully supported.

Step 1.

The following lines should be added on each page after your <title> tag and just before your </head> tag (this should be added once per page and you need to replace the highlighted www.example.com domain with your own domain):

<!-- stardevelop.com Live Help International Copyright - All Rights Reserved //-->
<!--  BEGIN stardevelop.com Live Help Messenger Code - Copyright - NOT PERMITTED TO MODIFY COPYRIGHT LINE / LINK //-->
<script type="text/javascript">
    var LiveHelpSettings = {};
    LiveHelpSettings.server = 'www.example.com';
    LiveHelpSettings.embedded = true;
    (function(d, $, undefined) { 
        $(window).ready(function() {
            // JavaScript
            var LiveHelp = d.createElement('script'); LiveHelp.type = 'text/javascript'; LiveHelp.async = true;
            LiveHelp.src = ('https:' == d.location.protocol ? 'https://' : 'http://') + LiveHelpSettings.server + '/livehelp/scripts/js.min.js';
            var s = d.getElementsByTagName('script')[0];
            s.parentNode.insertBefore(LiveHelp, s);
        });
    })(document, jQuery);
</script>
<!--  END stardevelop.com Live Help Messenger Code - Copyright - NOT PERMITTED TO MODIFY COPYRIGHT LINE / LINK //-->

Step 2 (Optional).

The following lines need to be added where you wish to display the Chatstack status indicator button (you may display multiple Chatstack status buttons on a single page):

<!-- stardevelop.com Live Help International Copyright - All Rights Reserved //-->
<a href="#" class="LiveHelpButton"><img src="/livehelp/include/status.php" id="LiveHelpStatus" name="LiveHelpStatus" class="LiveHelpStatus" border="0" alt="Live Help" /></a>
<!-- END Live Help HTML Code - NOT PERMITTED TO MODIFY IMAGE MAP/CODE/LINKS //-->

Please note: The second step above is optional and should only be added to web pages that you wish to display a separate Online / Offline button. The chat button may not be required as the live chat tab will appear in the bottom right corner of your web pages.

The post Chatstack v5.1 HTML Code appeared first on Live Help Documentation.

How can I setup a text link for the live chat status?

$
0
0

If you don’t wish to use an image for the Online / Offline chat button then you can easily setup a text link instead.

You would need to use the live chat HTML code at http://www.chatstack.com/kb/live-help-jquery-html-code/. The first step of the live chat HTML code is the JavaScript code and is required. Then you would need to modify the second step chat code to show a text link instead of the normal image button that would be shown. The following code will also automatically update according to the availability of your team.

<!-- stardevelop.com Live Help International Copyright - All Rights Reserved //-->
<a href="#" class="LiveHelpButton" title="Live Chat"><span class="LiveHelpTextStatus">Contact Us</span></a>
<!-- END Live Help HTML Code - NOT PERMITTED TO MODIFY IMAGE MAP/CODE/LINKS //-->

Tip: You can modify the language of the Online, Offline, Be Right Back and Away status modes in the language pack files.

The post How can I setup a text link for the live chat status? appeared first on Live Help Documentation.

Viewing all 31 articles
Browse latest View live